Process many images in sequence
Overview
These instructions show you how to run a simple demo which analyzes three images in sequence. You can use this technique to analyze multiple images in a batch.
Instructions
- Make sure you
- have run Analyze a small image
- have a good understanding of what the code did
- Now look in the
demosfolder of your repository and find theconfiguration_data.xmlfile for example_D. It should look like this.
<?xml version="+ 0" encoding="windows-1252"?>
<MyoVision_analysis>
  <task_files>
    <task>
      <raw_image_file_string>..\demos\example_D\raw_images\image_+ png</raw_image_file_string>
      <results_folder>..\demos\example_D\results\image_1</results_folder>
    /task>
    <task>
      <raw_image_file_string>..\demos\example_D\raw_images\image_2.png</raw_image_file_string>
      <results_folder>..\demos\example_D\results\image_2</results_folder>
    </task>
    <task>
      <raw_image_file_string>..\demos\example_D\raw_images\image_3.png</raw_image_file_string>
      <results_folder>..\demos\example_D\results\image_3</results_folder>
    </task>
  </task_files>

  <image_to_label_parameters>
    <block_size>1000</block_size>
    <saturation_percent>10</saturation_percent>
    <min_object_size>50</min_object_size>
    <watershed_distance>10</watershed_distance>
  </image_to_label_parameters>

  <classifier_parameters>
    <classification_model_file_string>..\demos\example_A\classification_model\classification_model.svc</classification_model_file_string>
  </classifier_parameters>

  <refine_fibers_parameters>
    <max_iterations>15</max_iterations>
    <sigma>2</sigma>
  </refine_fibers_parameters>
</MyoVision_analysis>
- The key thing about this configuration file is that it has 3 tasks instead of just +
- the first task analyzes
image_1 pngand stores the results in theresults\image_1folder - the second task analyzes
image_2.pngand stores the results in theresults\image_2folder - the third task analyzes
image_3.pngand stores the results in theresults\image_3folder
- the first task analyzes
-
That’s basically it. You can instead this technique for any number of image files, simply by adding new tasks to your configuration file.
- To run the demo, open a command prompt
- If you don’t know how
- type cmd in the Search field of your Start Menu
- or Google it to find instructions that work for you
- If you don’t know how
- Change the directory to the Python_code folder of your repository
- If you installed Python_MyoVision in
c:\users\your_username_here\GitHub\Python_Myovision
you can type
cd c:\users\your_username_here\GitHub\Python_Myovision\Python_code
and press enter
- If you installed Python_MyoVision in
-
In the command window, type
python py_vision.py analyze_images “..\demos\example_D\configuration_data\configuration_data.xml”
and press enter -
Within a few seconds, you should see status updates in the command window
- Once the program has finished, look in the results folder specified in the configuration file.
- By default that should be
c:\users\your_username_here\GitHub\Python_Myovision\demos\example_A\results
- By default that should be
- You should see 3 folders:
- results_1
- results_2
- results_3
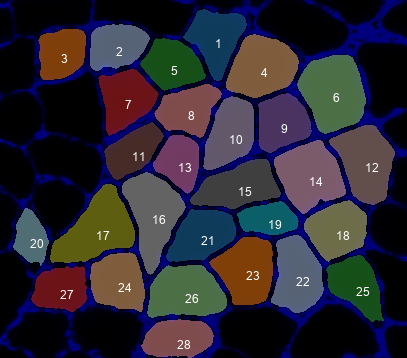
- Inside each of them, you should see the following files:
- final_results.xlsx
- clean_overlay.png
- annotated_overlay.png
- processing.zip
Here are the results:
-
Image 1


-
Image 2


-
Image 3

